Fall Hot Tub Cover Checklist: 7 Things to Inspect Before the Cold Hits
Fall is the best time to check your hot tub cover for winter, not January. Once temperatures drop and snow starts piling up, a cover that's already weak will fail fast and you'll be dealing with a soggy, frozen mess instead of a quick fix. A ten-minute inspection now can tell you whether your cover is ready for the cold, or whether it's time to plan ahead before the first freeze.
This guide walks through a simple 7-point checklist you can run through yourself, right now, before the weather turns. Along the way, we'll also cover hot tub covers and how to tell the difference between a cover that just needs a little care and one that's actually done.
Why Fall Is the Right Time to Inspect Your Cover
The honest answer: because problems are much easier to catch now than they are once snow and ice are involved. In fall, you can still see cracks clearly, lift the cover without fighting frozen straps, and order a replacement with enough lead time to have it before winter really sets in. Wait until December, and a small issue like a slow leak or a loose seam can turn into a fully waterlogged cover almost overnight.
Before we get to winter itself, it's worth browsing hot tub covers so you know what a properly fitted, well-insulated cover should look and feel like that's your baseline for comparison as you inspect your own.
7 Things to Check on Your Hot Tub Cover Before Winter
1. Cracks, Tears, and Damaged Vinyl
What to check: Run your hand over the entire top surface and sides, paying close attention to fold lines and the hinge area, where stress builds up over years of opening and closing.
Why it matters: Even a small crack in the vinyl lets water seep into the foam underneath. Once winter arrives, that trapped water freezes and expands, turning a minor crack into a much bigger tear.
What to do: Small surface scuffs usually aren't urgent. Any crack you can fit a fingernail into, or a tear near a seam, means water is already getting in this is a repair-or-replace situation, not a wait-and-see one.
2. Water Pooling or Unusual Weight
What to check: Lift one end of the cover. Does it feel noticeably heavier than it used to, or do you notice water sitting in a dip on top instead of running off?
Why it matters: A cover should shed water, not hold it. Pooling water is often the first visible sign of waterlogging water has worked its way into the foam core and isn't draining back out.
What to do: If the cover feels significantly heavier on one side, or water pools in the same spot every time it rains, the foam underneath is likely already saturated. This tends to get worse, not better, once temperatures drop and that water freezes.
3. Sagging or Loss of Shape
What to check: Step back and look at the cover from a distance. Does the center dip down instead of staying level with the taper?
Why it matters: Sagging usually means the foam core has broken down or absorbed water and lost its structure. A sagging cover also collects more rain and snow in the middle, which adds weight and makes the problem worse.
What to do: Mild sag on an older cover is common and worth monitoring. A cover that's visibly bowed in the middle, especially a newer one, is a sign the insulation is failing and won't perform well once the real cold arrives.
4. Foam and Insulation Condition
What to check: Gently press down on the center of the cover. It should feel firm with a bit of give, not spongy, mushy, or like it's collapsing under light pressure.
Why it matters: The foam core is what actually holds the heat in. If it's degraded or waterlogged, your spa's heater has to work harder to maintain temperature, and that shows up on your energy bill.
What to do: A firm, springy feel means the foam is in good shape. A soft, mushy, or slow-to-recover feel means the insulation has broken down and won't provide much protection once temperatures fall.
5. Seams, Edges, and Moisture Entry Points
What to check: Look closely along every stitched seam, the outer edge, and anywhere two panels meet. These are the most common places for water to sneak in.
Why it matters: Seams take constant flexing every time the cover opens and closes. Once stitching starts to separate or a seam edge lifts, it becomes a direct entry point for rain and melting snow.
What to do: Tight, flat seams with no gaps are a good sign. Any seam you can see daylight through, or where the stitching has visibly pulled apart, needs attention before winter moisture makes it worse.
6. Straps, Handles, and Hardware
What to check: Test every strap buckle, and give each handle a firm (not aggressive) tug.
Why it matters: Straps are what hold the cover down against wind, and handles are how you'll actually be lifting a cover that's often wet or partially frozen. Hardware that fails in winter is far more inconvenient than hardware that fails in September.
What to do: Replace any cracked buckle or fraying strap now, while it's an easy fix. A cover that isn't strapped down securely is far more likely to shift or blow off during a winter storm.
7. Overall Fit and Seal Against the Spa
What to check: Close the cover completely and look at how it sits on the spa. Are there gaps along any edge, or does it sit unevenly on one side?
Why it matters: A cover's fit is what actually determines heat retention. Even a cover in otherwise good condition won't perform well in winter if it doesn't seal tightly against the spa's edge.
What to do: A snug, even fit with no visible gaps means the cover can still do its job. If it's never fit quite right, or has loosened over time, that's worth addressing before the temperature drop makes every inefficiency more costly.
Fall Hot Tub Cover Inspection Checklist (Quick Reference)
|
What to Check |
What to Look For |
Why It Matters |
What to Do |
|
Vinyl surface |
Cracks, tears, cuts near folds or the hinge |
Lets water into the foam core, which then freezes and expands |
Minor scuffs: monitor. Any crack you can catch a fingernail on: repair or replace |
|
Weight & pooling |
Cover feels heavier than usual, or water sits in a dip |
Early sign of waterlogging inside the foam |
If it's heavier on one side or pools in the same spot repeatedly, the foam is likely saturated |
|
Shape |
Center sagging instead of staying level |
Foam breakdown or water absorption; collects more rain and snow |
Mild sag: watch it. Visible bowing, especially on a newer cover: insulation is failing |
|
Foam firmness |
Spongy or mushy feel when pressed |
Foam is what holds heat in; degraded foam raises heating costs |
Firm with slight give: fine. Soft or slow to recover: insulation has broken down |
|
Seams & edges |
Gaps, separated stitching, visible daylight through a seam |
Seams are the most common moisture entry point |
Tight and flat: good. Any visible gap: needs repair before winter moisture gets in |
|
Straps & hardware |
Cracked buckles, fraying straps, loose handles |
Straps secure the cover against wind; handles matter more once it's wet or icy |
Replace worn hardware now, while it's a simple fix |
|
Fit & seal |
Gaps along any edge when closed, uneven sitting |
Determines actual heat retention regardless of cover condition |
Snug, even fit: good. Persistent gaps: address before cold weather increases heat loss |
When to Repair vs. When to Replace
If most of the checklist above comes back clean solid vinyl, firm foam, tight seams, secure hardware a little cleaning and conditioning is probably all your cover needs before winter.
If you're finding two or more of these issues, especially waterlogging, sagging, or seams that have started to separate, repair usually isn't a lasting fix. A cover that's already letting water in during fall will only get worse once that water starts freezing and thawing repeatedly through winter. At that point, winter hot tub cover replacement is the more practical option, both for protecting your spa and for keeping your energy bill from creeping up all season.
If you decide replacement is the right call, you have two paths depending on your timeline. For a cover built to your spa's exact measurements, browse the custom hot tub covers collection. If the first freeze is close and you need something in hand quickly, the ready-to-ship spa covers collection covers common sizes without the custom lead time.
What Homeowners Can Do Before the First Freeze
Beyond the checklist itself, a few habits make a real difference heading into winter:
-
Clean and dry the cover fully before the first cold snap, so no moisture is trapped against the vinyl
-
Check strap tension after any major windstorm, not just once in fall
-
Brush off heavy snow accumulation promptly instead of letting weight build up over days
-
Avoid setting anything on top of the cover, even briefly, since cold vinyl becomes more brittle and prone to cracking
None of these take long, but together they're the difference between a cover that makes it through winter and one that needs replacing mid-season.
Frequently Asked Questions
Q1.How do I prepare my hot tub cover for winter?
Start with a full inspection check the vinyl, seams, foam firmness, straps, and overall fit. Clean and dry the cover completely, tighten or replace any worn straps, and confirm it's sealing evenly against the spa before cold weather sets in.
Q2.What should I inspect before winter?
Focus on seven areas: vinyl condition, unusual weight or pooling water, sagging, foam firmness, seam integrity, strap and hardware condition, and how tightly the cover seals against the spa.
Q3.Can snow damage a hot tub cover?
Yes. Accumulated snow adds significant weight, which can stress a cover that's already sagging or waterlogged. A cover in good condition handles normal snowfall fine, but repeated heavy accumulation on a weakened cover can cause it to collapse in the middle.
Q4.How do I know if my cover is waterlogged?
The most reliable signs are a cover that feels noticeably heavier than before, water pooling on top instead of draining off, and a soft or mushy feel when you press down on the foam core.
Q5.Should I replace my hot tub cover before winter?
If your cover shows two or more warning signs waterlogging, sagging, separating seams, or a poor seal, replacing it before winter is usually more practical than repairing it, since freezing and thawing tends to accelerate existing damage.
Q6.What happens if a hot tub cover is damaged during winter?
Damage tends to compound quickly. Water that gets in through a crack or seam freezes, expands, and widens the opening, which lets in more water on the next thaw. A cover that starts winter in poor shape rarely improves on its own.
Q7.How often should I inspect a hot tub cover in cold weather?
A quick visual check after any major storm is enough looking for excess snow buildup, shifted straps, or new sagging. A more thorough check, like the one in this article, is worth repeating once in early winter if fall conditions were unusually wet.
Custom-Made for a Perfect Fit
Every spa is unique, which is why we don’t believe in "one size fits all." We specialize in custom hot tub covers designed using advanced CAD (Computer-Aided Design) technology. This ensures that every cover is built to your exact dimensions, providing a snug, airtight seal that locks in heat and keeps out debris.
If your current cover is heavy, waterlogged, or cracked, it’s time for a hot tub cover replacement. Our streamlined ordering process makes it easy to upgrade to a handmade, high-performance cover that will restore your spa’s efficiency and aesthetic appeal.

Heavy-Duty Handles
Double-stitched, marine-grade vinyl for maximum durability and a premium look.

Safety Straps
Reinforced, color-matched straps designed to withstand high winds and heavy use.

Reinforced Stitching
Double-stitched seams and hinges to ensure your cover lasts for years.
Other Guys
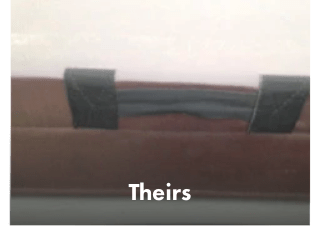
Their cheap handles are more prone to wear and tear and are known to rip off within the first two years plus the appearance speaks for itself.
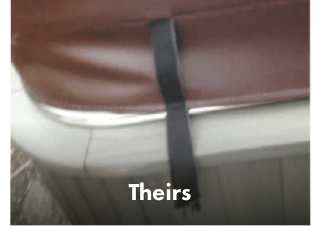
Our competition uses low-quality straps that are prone to breakage and often times do not match the color of the spa cover.

Their use of single stitching and exposed shells can ultimately cause cracking and heat loss, costing you more on your electric bill.
Why Choose MySpaCover?
We don’t just claim to have the best quality, we prove it through superior materials and craftsmanship. Every cover we produce is "Made in the USA" and built to exceed industry standards, ensuring your investment is protected for years to come.
We’ve found a few great alternatives to your selected spa cover that can reach you even quicker!
Here are the closest available alternatives based on your preferences.